
Renovation guide: 7 steps to success
Follow this route map through the process to ensure your project runs like a dream
Making your home more enjoyable to live in might involve a radical redesign, building an extension or simply sprucing up certain areas. Whichever path you choose, follow this renovation guide to get the most out of your project.
Before embarking on a home renovation, consider how much time, effort and money you can devote to the task. The answers will help you decide whether to tackle a top-to-bottom overhaul in one go or to make a series of smaller changes that you can undertake in stages as time, energy and funds allow.
If you are contemplating buying a property that needs work, take a builder or architect along before you put in an offer to assess what’s likely to be involved. Professional advice could save regrets later. And check whether the works will take your home over the ceiling price for the area, to be sure you’re not overspending.
1. Create a renovation brief
Start your project plan by identifying and listing all the basic things that need attention. This could involve fixing the roof, checking the walls for signs of movement, dealing with damp, rot or woodworm and updating the wiring and heating system. Whether reconfiguring rooms or extending, think about how you might improve the way you move around your home and ways to gain extra light. Planning is the most essential step on the renovation guide – do not be tempted to just get stuck in and see how it goes.
‘Once you know how many bedrooms or other must-have rooms you need, have a broad brief in mind for your architect or builder. Avoid rigid preconceived ideas, as you may miss an opportunity to explore changes that you hadn’t considered,’ says Richie Tutill, Associate Director, Jonathan Hendry Architects.
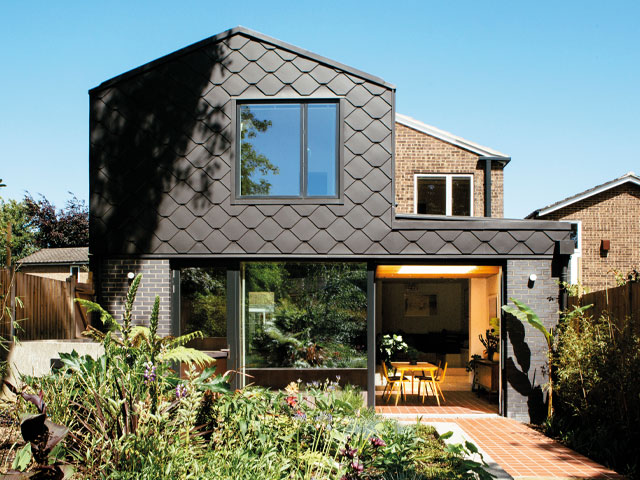
R2 Studio removed the garage at the side and added a two-storey zinc-clad wraparound extension to this 60s detached house in Crystal Palace, south London. The addition allowed for an open-plan living/kitchen/diner downstairs with three double and one single bedroom above. Photo: Anna & Tam
2. Set a budget and raise funds
Be certain about how much you can afford to spend, whether by drawing on savings or borrowing money. Don’t be tempted to increase this amount, but do include a 15% contingency of the total cost to cover unexpected expenses. Bear in mind it’s not just the building work you need to pay for but also professional fees such as for a surveyor, structural engineer, architect and solicitor. Plus there may be the cost of planning application fees, insurance, a warranty and connections to services.
Most high street lenders only offer mortgages on habitable properties, but there are lenders that specialise in renovation mortgages and self-build mortgages. If you’re renovating or extending your home, check whether your mortgage provider will increase your borrowing, or consider taking out a separate loan for home improvements. If you already own a home and are renovating a different property, you may be able to remortgage your original home to do so.
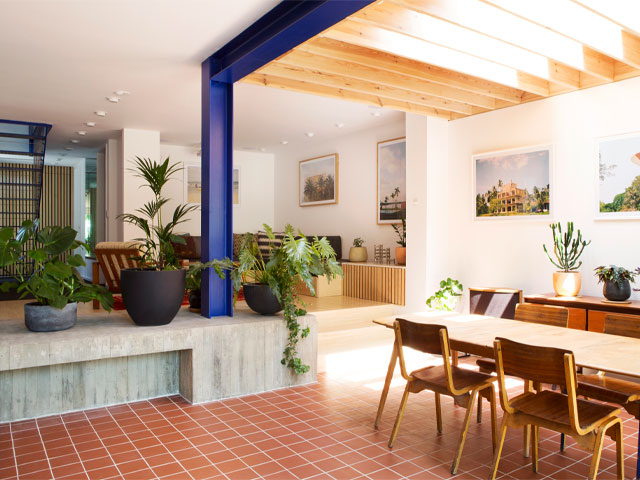
R2 Studio’s Crystal Palace renovation has a painted structural beam reminiscent of Rob and Ruth’s Cumbrian Mill project from Grand Designs. Photo: Anna & Tam
3. Build a renovation team
Gathering a skilled, reliable and experienced group of professionals to complete your project is one of the most important parts of a renovation guide as it can determine the success of your project. It comes down to the scale and complexity of the project as to whether you need an architect. Simple repairs and sprucing up improvements can be completed by a builder, plumber, electrician and so on. Still, a RIBA-registered architect is trained to devise inventive, creative solutions that you may not have thought of. Some will offer a full-service package or you could ask a specialist design and build firm instead.
To find a reputable builder, ask friends and neighbours for a recommendation, and visit completed and in-progress projects to check the company’s work. Look for those who belong to a trade association such as the Federation of Master Builders, which also offers an online Find a Builder tool. Employing a person with project management experience to oversee the work prevents unnecessary delays and unexpected costs. ‘It’s crucial that someone makes sure the build is delivered as designed and agreed,’ says Michael Schienke, director of Vorbild architecture.
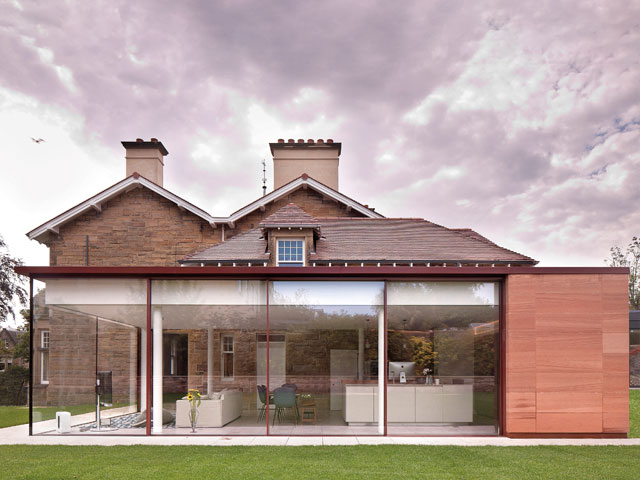
Archer & Braun architects created a contemporary extension to this Grade B listed six-bedroom villa in a conservation area in Edinburgh, Scotland. The contractor, Elite Property Solutions, also carried out changes at the back of the ground floor and to the first floor. Photo: David Barbour
4. Get planning permission
When remodelling the interior of your home, such as by moving walls, no planning permission is needed. But you may need a party wall agreement with your neighbours, and if the wall to be removed is structural, a surveyor must calculate and approve the size of a joist to support the opening or storey above. Changes to the front of a house, such as adding a porch, do require planning permission, though like-for-like window replacements usually do not. Many loft conversions and extensions come under permitted development rights (PDR) provided the size restrictions are not exceeded and that the house is not in a conservation or other designated area. Check the requirements at the Planning Portal.
If your renovation falls outside PDR, you’ll need planning permission, in which case find out whether similar projects have been carried out in your road to get an idea of what’s likely to be permitted. A chat with a local architect, or your council’s planning office would also be helpful for this reason. For work on a Listed building, an experienced architect is a must, and a heritage consultant may also be needed.
‘If you submit a controversial application without prior council consultation or backed up by the necessary information and research it is not unheard of for the process to take six months or more,’ says Sarah Braun, of Archer & Braun Architecture.
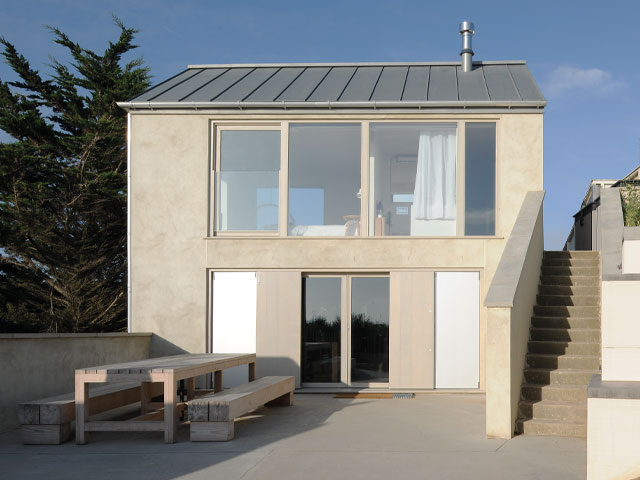
Jonathan Hendry Architects added two more bedrooms to this 60s two-bed house near Anderby Creek, Lincolnshire. Originally the ground floor was a storeroom/garage, with no internal connection to the first floor. Photo: David Grandorge
5. Obtain the paperwork
To prevent confusion or disputes during the build, it’s important to specify the details of the works in drawn or written form. Some building companies offer a full schedule of costs with materials and quantities prepared by their own quantity surveyor, but smaller contractors don’t always have the time or resources. ‘A fully costed schedule is the preferred route. The RIBA domestic building contract would be suitable for most renovation projects,’ says Dan Gray, architect and owner of Studiotwentysix.
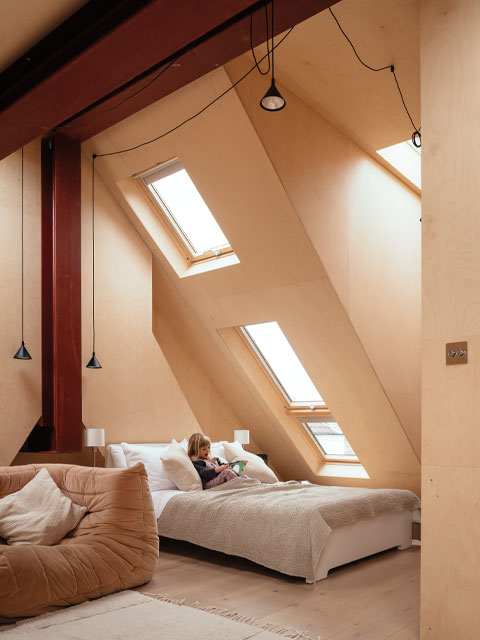
Architect Dan Gray of Studiotwentysix gave his Edwardian three-bed semi in Hove, Brighton, a 55sqm dormer loft extension. He gained an open-plan living space, study and en suite. Photo: Jim Stephenson
6. Keep your renovation on track
From the arrival of a skip to the delivery of kitchen cabinets, timing and project management is a hugely important part of any renovation guide. Before work begins, address any access issues to the site, notify building control, and organise waste removal. Regular site inspections are important to check for structural errors. As well as visits from your own architect and project manager, building control will inspect the site at particular stages. By using workflow software you’ll have a visual record of the schedule. A Gannt chart app is a simple graphic way to plot the build. And stay on budget by updating figures weekly and making adjustments if needed.
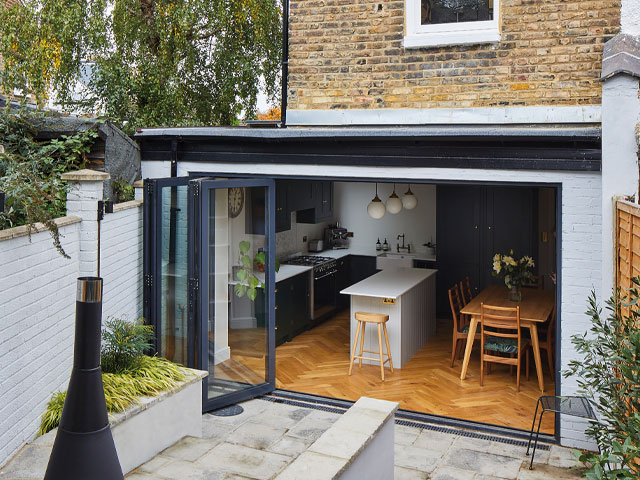
Architectural practice Vorbild renovated a four-bed end-of-terrace in Walthamstow, east London, adding a dormer loft extension to create a guest bedroom and shower room, plus a small downstairs extension, adding 20-25sqm. Photo: Chris Snook
7. Check the quality
No renovation guide is complete without a note on checks and snags. Make regular inspections at key stages to check that everything is true to the design and specification. ‘The omission or substitution of any part can have a detrimental effect on the overall quality of the build, as can the misalignment of structural elements or masonry,’ says Rhona Waugh, director at Found Associates. To the untrained eye, structural errors are not as easy to spot as something such as bad tiling. So your architect or project manager will need to be on site for these stages.
At the end of the build, check that you’ve got the certificate from Building Control and any warranties. Snagging is a final walkthrough to note down any minor defects and ensure that everything has been finished satisfactorily. It should take place shortly after the completion certificate has been issued. It is an accepted practice in the building industry to hold back around 2.5-5% of the agreed contract price to cover any snagging work – make sure that this is written into your contract at the start of the project. You will need to write a detailed snag list of everything that needs to be fixed and sorted out before you settle your contractor’s final bill. Check out the Grand Designs magazine snagging checklist here.